
So, you’ve just finished your laundry, and you’re thinking it’s smooth sailing from here, right? But lo and behold, your dryer decides to throw a wrench in the works. Ah, life in Brooklyn, New York, where even our appliances like to keep things spicy!
Why Dryers Act Up in the First Place?
First things first, let’s get the lay of the land. Why do dryers, whether you’re in a posh apartment in downtown Brooklyn or a cozy family home, get a little temperamental sometimes? Well, there are a handful of usual suspects:
- Wear and Tear: Just like how our knees might creak a bit after climbing the Brooklyn Bridge, dryers can show their age over time. It’s natural!
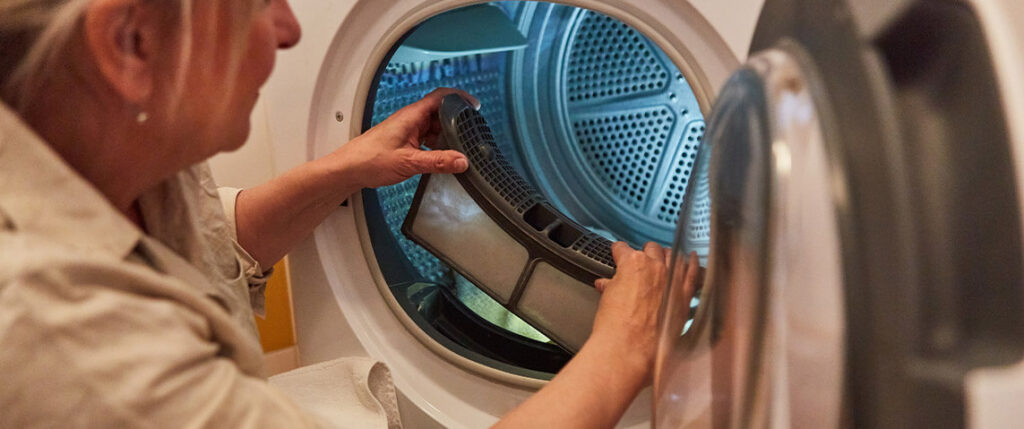
- Lack of Maintenance: Let’s face it, we’ve all been guilty of neglecting our chores. A dryer that hasn’t seen a lint brush in ages will surely cry out for some TLC.
- External Factors: Ever heard the saying, “It’s not you, it’s me?” Sometimes, it’s not the dryer but issues with the power supply or the room’s humidity.
Got a Specific Problem in Mind?
- Overheating? Too much of anything is bad, even heat for a dryer.
- Taking eons to dry? It might not be lounging around. There could be a genuine issue!
- Strange sounds? Nope, it’s not haunted. Just some machine parts acting up.
A Quick Glimpse at Common Issues: To give you a bird’s-eye view, here’s a compact table detailing the most frequent hiccups folks face:
| Problem | Likely Cause | Quick Fix |
| Overheating | Blocked vents or malfunctioning thermostats | Clean vents or replace the thermostat |
| Clothes not drying | Lint buildup or a broken heating element | Clean out lint or replace the element |
| Unusual noises | Loose parts or foreign objects in the drum | Check for loose items or tighten any wobbly parts |
Ready to Dive Deeper?
Buckle up, because we’re about to embark on a detailed journey exploring each problem and its potential solution. And trust me, by the end of this ride, you’ll feel like a dryer maestro, ready to tackle any twist or turn your appliance throws your way. Whether you’re a DIY enthusiast or someone just trying to save a quick buck, this guide’s got your back.
But, hey, a word of caution – while rolling up your sleeves and diving in might sound fun, sometimes it’s best to call in the cavalry (i.e., a professional). Especially when you’re unsure or the problem seems out of your league. After all, better safe than sorry, right?
Disconnect Power: Safeguarding Yourself and Your Home

Ah, the thrill of DIY repairs! But hold your horses; before diving headfirst into the world of wires, circuits, and heating elements, it’s paramount to first get one thing straight: safety. And when we’re talking about safety with electrical appliances, the first golden rule is to disconnect the power. You know the saying, “It’s all fun and games until someone gets zapped”? Let’s avoid that scenario, shall we?
1. Unplug, Unplug, Unplug:
- Why is this important? Well, it’s the most straightforward way to ensure there’s no current running through the dryer. So, simply put, no power = no accidental shocks. Easy peasy, right?
- How to do it: Locate the power cord, typically at the back of your dryer, and gently pull the plug from the electrical socket. Remember, yanking it out by the cord can damage both the plug and the socket, so always grab and pull from the plug itself.
2. Securing Hardwired Connections:
- Why should you bother? Some dryers aren’t plugged into a regular socket; instead, they’re hardwired directly to the home’s electrical system. In these cases, unplugging isn’t an option, but you’re not out of options!
- The solution: Trip the circuit breaker or remove the fuse that powers the dryer. Not sure which breaker it is? Well, it’s time to play detective. Most electrical panels have labels, but if yours doesn’t, you might have to test a few. Remember to turn off and then turn back on one breaker at a time to identify the right one.
3. Double-Check for Safety’s Sake:
- Why this extra step? Trust but verify! After disconnecting the power, it’s always smart to ensure the dryer is indeed powerless. Better to be overcautious than, well, electrocuted.
- How to be sure: Use a multimeter to check if there’s any current running through the dryer. If multimeters sound like rocket science to you, don’t fret. A simple test is to try turning the dryer on. If it remains off and silent, you’re good to go!
In wrapping up this section, let me say this: While enthusiasm is fantastic and a can-do attitude is commendable, don’t play fast and loose with electricity. When in doubt, consult an expert or a friend who knows their way around appliances. After all, as the old adage goes, “Better safe than sorry!”
Proper Ventilation: Breathing Easy During Repairs
Diving deep into the belly of the beast—err, I mean, your dryer—can be a bit overwhelming. But, one thing’s for sure: it shouldn’t leave you gasping for air! Here’s the lowdown on ensuring proper ventilation, a factor that’s often overlooked yet crucial when tinkering with your appliance:
1. The Rationale Behind Ventilation:
- Why is it a big deal? Picture this: your dryer’s been acting up, maybe it’s not heating up correctly or it’s giving off a strange smell. Now, if you decide to dive in without proper ventilation, you might just find yourself nose-to-nose with accumulated gas or exhaust. Not a fun date, I assure you.
- The science-y bit: Dryers, especially gas ones, produce combustion gases. If they’re not adequately vented out, these gases can accumulate, leading to poor air quality and potential health hazards. Plus, good airflow can help you spot any issues with the dryer’s exhaust system.
2. Setting the Stage for Safe Repairs:
- Open wide: If your dryer is located in a relatively confined space, like a small laundry room, fling open the windows and doors. This will ensure a consistent flow of fresh air, pushing out any noxious gases.
- Fan-tastic idea: Consider using a fan to speed up the ventilation process. Place it near the doorway or window to help usher out stale air and usher in the fresh. It’s like giving your repair space a much-needed breath of fresh air—literally!
3. Special Mention: Gas Dryers:
- Extra caution: If you’re working with a gas dryer, it’s doubly crucial to ensure proper ventilation. A gas leak, however small, can be dangerous. Keeping the area well-ventilated helps dissipate any potentially harmful gases, ensuring they don’t reach hazardous concentrations.
- Sniff test: In the rare event you smell gas—described by many as a rotten egg odor—stop your repair immediately. Turn off the gas supply, leave the premises, and call for professional help. Some things are better left to the pros!
In a nutshell, think of proper ventilation as your trusty sidekick during dryer repairs. It ensures a safer, more comfortable environment for you to work in. And remember, while you’re a whiz with that wrench and can decipher an appliance manual like it’s a bestselling novel, your lungs aren’t superhero-level. They appreciate clean, fresh air just like the rest of us!
Use Appropriate Tools: Your Best Allies in Dryer Repairs
Let’s be real for a second: while enthusiasm and a little elbow grease can work wonders, using the wrong tool for a job can turn your dryer repair from a breezy afternoon task into an absolute circus. It’s like trying to eat soup with a fork—it just doesn’t work! Here’s the skinny on picking the right tool for the task and ensuring a hassle-free repair journey:
1. The Marvel of Insulated Tools:
- Why insulate? Working with electrical appliances is no child’s play. Insulated tools act as a protective shield, minimizing the risk of accidental shocks. It’s like having a guardian angel, but for DIY repairs!
- Tool tip: Look for tools that have handles covered with thick, non-conductive material. Often, these will be marked with a voltage rating, giving you a heads-up on the level of protection they offer.
2. The Right Tool for the Right Job:
- Avoid improvisation: MacGyvering might sound fun, but using a butter knife instead of a screwdriver isn’t just ineffective—it can be downright dangerous. Remember, tools are designed for specific tasks for a reason.
- A basic toolkit might include:
- Pliers: For gripping and bending.
- Screwdrivers: A set with both flat-head and Phillips head, for various screws.
- Wrenches: Adjustable ones can be a godsend.
- Multimeter: To test electrical components safely.
3. Keep ’em Clean and Sharp:
- Maintenance matters: Just like you wouldn’t use a blunt knife to chop veggies, always ensure your tools are in top shape. A rusty or dirty tool can compromise both the repair and your safety.
- Storage smarts: Post-repair, store your tools in a dry, organized toolbox. This not only extends their lifespan but ensures they’re always ready for action when you need them.
4. When in Doubt, Get a Kit:
- Why a kit? Sometimes, the array of tools needed can be overwhelming. Investing in a dryer repair kit can simplify things. It’s like having a treasure chest, tailor-made for your appliance’s quirks!
- Perks: These kits often come with model-specific tools, ensuring you won’t find yourself in a jam halfway through the repair.
Wrapping it up, always remember: your tools aren’t just inanimate objects; they’re extensions of your hands. Treat them with respect, choose them wisely, and they’ll reward you with a smooth-sailing repair session. And hey, while a bit of improvisation can jazz up a jazz tune or a recipe, when it comes to dryer repairs, it’s best to play it by the book!
Wrapping Up the Repair Rodeo
And there we have it, folks! From the initial pangs of dryer distress to arming yourself with the right tools and techniques, we’ve navigated the tumultuous seas of appliance repairs together. But before we bid adieu and you don your repair cape, let’s quickly recap and offer some parting pearls of wisdom:
- Safety First, Always: Remember, while your enthusiasm to fix things is commendable, always prioritize your safety and that of those around you. From disconnecting power to ensuring proper ventilation, these steps aren’t just formalities—they’re lifesavers.
- Equip Yourself Right: Whether it’s insulated tools, a handy multimeter, or just the right wrench, having the right tools on hand isn’t just about convenience. It’s about effectiveness and safety. Think of them as your trusty sidekicks in this repair adventure.
- Know When to Call in the Cavalry: While DIY has its charms, sometimes it’s okay to admit that a problem is beyond your ken. If you ever find yourself in over your head or feel uncertain, don’t hesitate to call a professional. There’s no shame in seeking help; after all, even superheroes sometimes need a hand!
- Celebrate Your Achievements: Whether you managed to fix the issue or just gained a better understanding of your dryer’s inner workings, give yourself a pat on the back. Every endeavor, every exploration, is a step forward. And hey, next time, you’ll be even more prepared!
In essence, while dryers might seem like complex beasts, with the right knowledge and a sprinkle of patience, they become less intimidating. Here’s to hoping your dryer lives a long, problem-free life! But if it ever acts up again, armed with this guide and your newfound expertise, you’ll be more than ready to tackle the challenge.
Happy repairing, and may your clothes always come out warm and wrinkle-free!
Frequently Asked Questions (FAQ) on Dryer Repairs
Q: How often should I clean the dryer vent?
A: At least once a year. Regular cleaning prevents lint buildup, which can cause inefficiency and potential fire hazards.
Q: My dryer is tumbling but not heating up. What could be wrong?
A: A few culprits might be responsible: a faulty thermal fuse, a malfunctioning heating element, or a broken thermostat. Always check the manual or consult with a professional.
Q: Can I use my dryer if the vent is clogged?
A: It’s not advisable. A clogged vent can lead to reduced efficiency, longer drying times, and even a potential fire risk.
Q: How long does an average dryer last?
A: With proper care and maintenance, most dryers can last about 10-13 years.
Q: Are there any signs that my dryer needs professional repair?
A: Yes, if it’s making strange noises, leaving burn marks on clothes, not turning on, or taking too long to dry, it’s time to call in the pros.
Q: Is it worth repairing an old dryer, or should I just replace it?
A: It depends. If the repair cost is over 50% of the price of a new dryer and your machine is more than 8 years old, it might be more cost-effective to replace it.
Q: Can I DIY repair my dryer, or do I need specialized training?
A: Many minor issues can be addressed with DIY repairs, especially with the right tools and guidance. However, for more complex problems, especially those involving gas lines or intricate electrical work, it’s best to consult a professional.
Q: How do I know if my dryer’s venting system is up to code?
A: Each region may have specific building codes. It’s best to check with local regulations or consult a professional installer to ensure compliance.
Q: Why are my clothes still damp after a full drying cycle?
A: Potential reasons could be a clogged vent, faulty heating element, or an overloaded dryer. Always ensure you’re not overloading the machine and check for any obstructions in the vent.
Q: What safety precautions should I take when working on my dryer?
A: Always unplug or disconnect power, ensure proper ventilation, use appropriate tools, and if ever in doubt, consult an expert. Safety first!