Hey there, Brooklyn, New York residents (and everyone else tuning in)! Ever found yourself pulling out damp clothes from the dryer, scratching your head and thinking, Why on Earth is this happening? Well, if you have, you’re not alone. Dryers, as fab as they are, can throw a curveball now and then. Let’s dive deep into the world of dryers and get to the heart of those pesky problems, shall we?
Why Dryers Act Up?
Most folks think of their dryer as that trusty, old pal that dries clothes in a jiffy. But, just like every superhero has an Achilles’ heel, dryers have their own set of issues. So, what are the usual culprits?
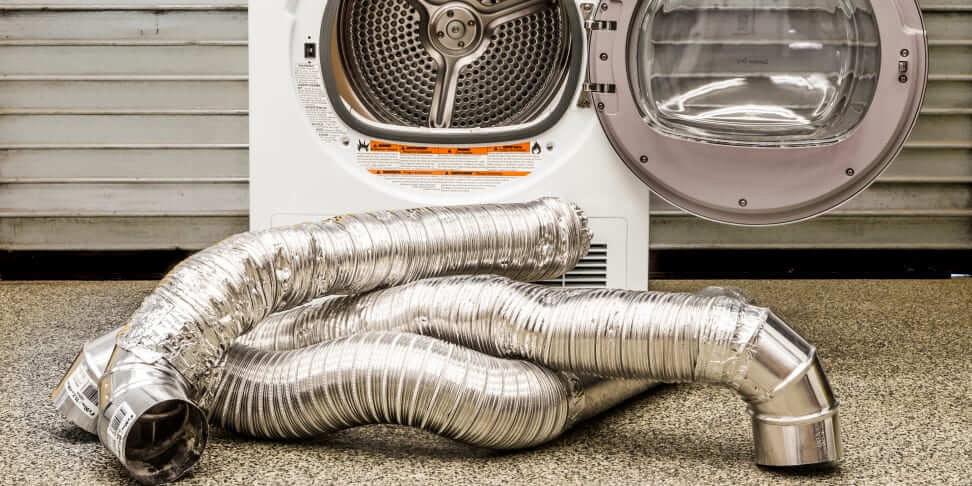
- Blocked Vents: The number one mischief-maker. It’s like trying to drink a thick milkshake through a tiny straw. Can’t do it, right?
- Thermostat Issues: Sometimes the internal thermostat has a hiccup. Maybe it’s taking a nap when it should be on the job. Naughty thermostat!
- Blown Fuses: Ah, the classic! When the fuse blows, your dryer stops dancing to the beat. Result? Wet clothes.
But Wait, Is Brooklyn Different?
Now, you might ask, why did you mention Brooklyn, New York specifically? Well, the unique urban environment of Brooklyn, with its tight spaces and quick living pace, might mean your dryer has less room to breathe. So, is it different? Yes and no. While the basics of dryer problems remain the same, the hustle and bustle of Brooklyn might just be adding its own touch of chaos to the mix.
Quick Fixes in a Table? Oh, Yeah!
| Problem | Quick Fix |
| Blocked Vents | Clean ’em out. A vacuum usually does the trick. |
| Thermostat Issues | Might need a professional’s touch. Best not to DIY this one. |
| Blown Fuses | Check the manual, find the fuse, and replace. Or call in the pros. |
Dryers, for all their awesomeness, aren’t perfect. Whether you’re in the heart of Brooklyn, New York, or somewhere on a countryside, these issues are pretty universal. But hey, with a bit of know-how, and sometimes a call to the experts, you’ll be back on track. Keep your chin up, and remember: when life throws you damp clothes, sometimes, all you need is a quick vent clean-up!
Signs Your Dryer Vent Needs Cleaning
Alright, folks, let’s get down to the nitty-gritty. Your dryer, though a trusty companion in the fight against damp clothes, might be sending you subtle (or not-so-subtle) SOS signals. Do you know what to look out for? No? Don’t sweat it! We’ve got you covered
- When Drying Feels Like Forever: Ever popped in a load, taken a quick nap, and woken up to find the clothes still… damp? If your clothes are taking eons to dry, it’s a clear cry for help. More often than not, this is a sign that your dryer vent is clogged. Think of it as a traffic jam in your vent.
- The Case of the Overheated Dryer: Touch your dryer. Is it hotter than a jalapeño? A hot dryer exterior is more than just a random quirk. It’s screaming, “Hey, I’m working too hard here!” A blocked vent can cause excessive heat, which is both inefficient and risky.
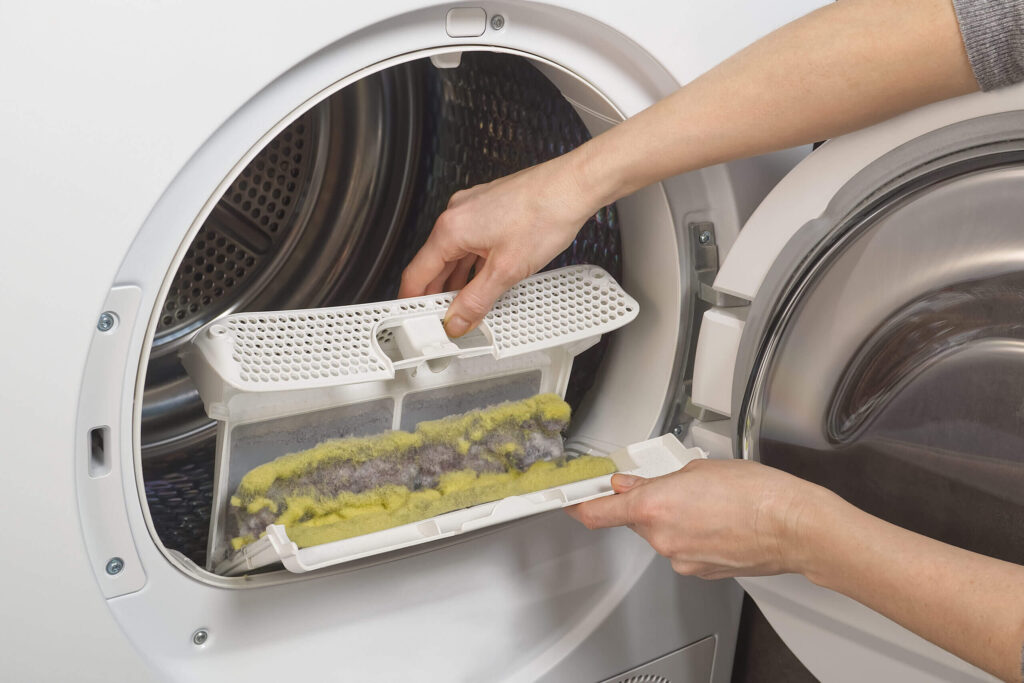
- Lint, Lint, Everywhere: Alright, seeing some lint in the trap after a cycle is par for the course. But, if you’re spotting lint around the door seal or even outside the vent, you’ve got a situation on your hands. That extra lint? It’s like your dryer’s way of leaving breadcrumbs for you.
- Mysterious Burning Odor: No, you’re not imagining it. If there’s a burning smell wafting from your dryer, it’s not just pulling a prank on you. Lint, when it gets too hot, can start to burn, producing that telltale scent. This isn’t just a sign; it’s a red flag!
- Been a While, Hasn’t It: Can’t remember the last time you cleaned your vent? Uh-oh! Just like we need a good ol’ spa day, your dryer vent needs regular pampering too. If it’s been over a year, your vent is probably dropping hints left and right.
Seeing any of these signs? If you’re nodding along, it’s high time to roll up those sleeves and get to cleaning (or call in the cavalry, aka professionals). After all, your dryer does so much for you. Time to return the favor, don’t you think?
Tools and Materials Needed
Alright, now that we’ve sussed out the signs and signals your dryer has been giving you, let’s get down to brass tacks. You wouldn’t go into battle without your armor, and cleaning out a dryer vent is no different. Before you start your vent-cleaning quest, you’ll need some trusty tools and materials by your side. Let’s break it down:
- The Mighty Dryer Vent Brush Kit: This bad boy is tailor-made for the task. Long, flexible, and with bristles that reach out and grab onto lint, it’s an absolute must-have. Remember, not all heroes wear capes; some come with bristles.
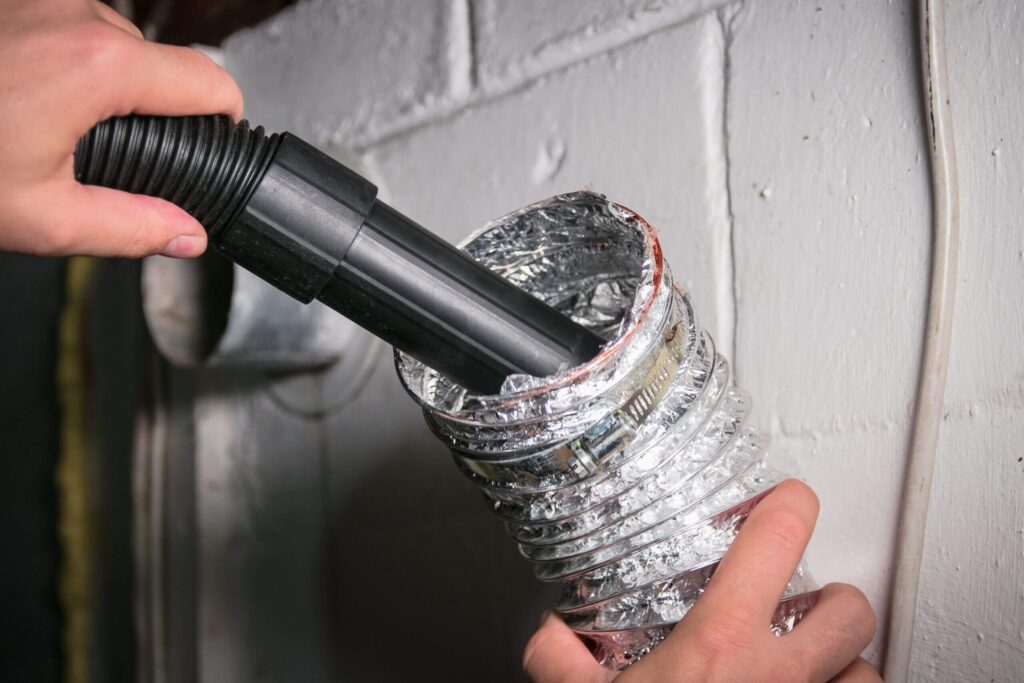
- A Vacuum with a Long Hose Attachment: Your regular household vacuum can come in handy here. Equip it with a long hose attachment, and it turns into a lint-sucking machine. We’re talking those nooks and crannies, folks!
- Handy-Dandy Screwdriver or Nut Driver: This little tool is key to loosening clamps and giving you access to the heart of the vent. Whether you’re more of a screwdriver person or lean towards a nut driver, either will do the trick.
- Protective Gear: Safety first! A pair of protective gloves will shield your hands from any sharp edges or unexpected gunk. And a mask? That’ll keep you from inhaling the dust and lint. After all, it’s always better to be safe than sorry.
- Towel or Old Rag: For those moments when you need a good wipe down or when your hands are just a bit too slick, keep a towel or an old rag nearby. Think of it as your trusty sidekick in this cleaning crusade.
Equipped with these tools and materials, you’re all set to embark on your dryer vent cleaning adventure. It might not be the stuff of epic tales, but trust us, your dryer will sing songs of your heroics. Ready, set, clean!
Maintenance Tips for Optimal Dryer Performance
Alright, folks, now that we’ve gone through the epic journey of cleaning that dryer vent, let’s talk about the aftermath. It’s all well and good to clean it once, but maintaining that pristine state? That’s where the true challenge lies. So, how can you keep your dryer performing at its peak? Let’s unpack some pro tips:
1. Regular Check-ins are a Must:
- Vent Inspection: Aim to peek inside that dryer vent every couple of months. A quick look can help you catch lint buildup early on. Think of it as your dryer’s routine checkup.
- Lint Trap Love: After every load, make it a habit to clean the lint trap. It’s a simple step that goes a long way. The less lint accumulates there, the less finds its way into the vent.
2. Mind the Load Size:
- Goldilocks Principle: Not too big, not too small – just right! Overloading the dryer not only stresses the machine but also reduces airflow. On the flip side, super small loads can be inefficient. Find that sweet spot!
3. Be Selective with Fabric Softener Sheets:
- Use Sparingly: While they might leave your clothes feeling oh-so-soft, fabric softener sheets can cause a waxy buildup on the lint trap. This can hinder the airflow. So, use them wisely!
4. Invest in a Dryer Vent Brush:
- Regular Cleaning: Even if you’re not doing a full vent clean, using your dryer vent brush every so often can help keep the passage clear. It’s like brushing your teeth – a bit of regular care avoids bigger issues down the line.
5. Pay Attention to Drying Times:
- Monitor Efficiency: If you notice clothes taking longer and longer to dry, it’s a cue! It might be time for a vent clean-up or a check on the dryer’s overall health.
6. Avoid Running the Dryer Unattended:
- Safety First: Try not to run the dryer when you’re out of the house or asleep. Keeping an eye (or ear) out can help you catch potential issues before they escalate.
7. Upgrade When Needed:
- Out with the Old: Dryers, like all appliances, have a lifespan. If your machine is getting up there in years and showing signs of wear and tear, consider upgrading. Newer models are often more efficient and safer.
Safety Precautions
Hold your horses! Before diving headfirst into your dryer cleaning escapade, it’s paramount to prioritize safety. After all, while we want that vent spick and span, we sure don’t want any mishaps along the way. So, without further ado, let’s delve into the safety measures you ought to keep front and center:
- Power Down: Before you so much as touch that vent, ensure your dryer is unplugged. Dealing with a gas dryer? Turn off the gas valve too. Electricity and gas are not to be trifled with!
- Gear Up: Don protective gloves to safeguard against sharp edges, potential critters, or accumulated gunk. And oh, that mask we talked about? Wear it to prevent inhaling lint and dust.
- Fresh Air: Ensure your workspace is well-ventilated. While dusting and cleaning, airborne particles can become a nuisance. A well-aired space makes the job less of a sneeze-fest.
- Mind the Surroundings: With the dryer pulled out, there might be cords, hoses, or even water puddles around. Stay vigilant to avoid any slips, trips, or falls.
- Avoid Harsh Cleaners: If you’re thinking of using any chemicals to clean around the dryer area, choose them wisely. Avoid flammable or overly harsh substances. And if you must use them, read the labels!
- Unwanted Guests: Sometimes, external vents can become a cozy home for small animals. Approach with caution. The last thing you want is a startled squirrel leaping out at you!
- Reconnection: When putting everything back, double-check all connections. Ensure the vent tube is securely attached, and if you’ve disconnected the gas, ensure it’s safely reconnected.
- First Run: Once everything’s set up, stick around for the first test run. Listen for odd sounds and sniff for any strange odors. Better to catch potential issues right off the bat.
Final Words
Whew! What a ride, right? Cleaning and maintaining your dryer vent isn’t just another item to tick off your household chore list – it’s a genuine labor of love. By tending to your dryer, you’re ensuring a safer home, efficient laundry sessions, and a machine that’ll keep humming for years to come.
Now, armed with the knowledge of signs to look out for, tools to arm yourself with, the nitty-gritty steps to cleaning, maintenance hacks, and, above all, essential safety precautions, you’re well-equipped for the task. No more shying away from the vent or crossing fingers hoping everything’s alright. With this guide in your back pocket, you’re in the driver’s seat.
Remember, like any beloved appliance, your dryer just needs a bit of TLC now and then. Give it that attention, and it’ll pay you back in spades – think crisp shirts, fluffy towels, and those perfectly dried jeans every single time.
So, here’s to taking matters into your own hands and mastering the art of dryer vent maintenance. Cheers to a job well done and the countless cozy, warm loads of laundry in your future. Until next time, happy drying!
Frequently Asked Questions (FAQs)
1. How often should I clean my dryer vent?
Answer: Ideally, you should inspect and clean your dryer vent annually. However, if you notice your clothes taking longer to dry or any other signs we’ve mentioned earlier, it might be time for a mid-year clean.
2. Can a clogged dryer vent be a fire hazard?
Answer: Absolutely! Lint is highly flammable. A clogged vent can cause the dryer to overheat, potentially igniting the lint. Regular cleaning is crucial for safety.
3. Do professional services clean dryer vents, and should I consider them?
Answer: Yes, there are professionals who specialize in cleaning dryer vents. If you’re uncomfortable doing it yourself or if it’s been a long while since the last cleaning, hiring a pro might be a good idea.
4. My dryer is located in the center of my home; does the vent still need cleaning?
Answer: Regardless of your dryer’s location, the vent can still accumulate lint and needs regular cleaning. In fact, longer vent ducts, often found in centrally located dryers, might have a higher risk of lint buildup due to the increased duct length.
5. Can I use any vacuum to clean the vent?
Answer: A typical household vacuum with a long hose attachment can work. However, there are specialized vacuums designed for dryer vents that offer a more thorough cleaning.
6. What are the signs of an overly clogged vent?
Answer: Some telltale signs include clothes taking longer to dry, the dryer becoming excessively hot, a burnt smell during operation, or a strong odor of fabric softener emanating from the exhaust vent.
7. How long does it take to clean a dryer vent?
Answer: For a typical home setup, it can take anywhere from 30 minutes to an hour. However, this can vary based on the vent’s length and the amount of buildup.
8. Is it normal for the dryer to release a small amount of lint even after cleaning?
Answer: Yes, it’s normal for a small amount of lint to escape, especially just after cleaning. However, if it’s a consistent issue, you might want to double-check the cleaning process.
9. Can pests enter through the dryer vent?
Answer: It’s possible. Birds, rodents, or other pests can sometimes make homes in external vents. This is why it’s important to ensure the external vent cover is securely in place.
10. Does a clean dryer vent help in saving energy?
Answer: Definitely! A clean vent allows the dryer to operate more efficiently, which in turn can save on energy costs.