Hey Brooklyn, New York residents! Ever found yourself with a pile of wet clothes and a dryer that’s just not up to the task? Let’s dive deep into the heart of these common dryer dilemmas. Whether you’re a newbie homeowner or a seasoned DIY veteran, there’s always something new to learn. And guess what? Sometimes, those pesky issues might just be simpler than they appear. Hang tight, and we’ll unpack these mysteries together!
Dryer Blues and Quick Fixes
- Age-Old Issue: It Doesn’t Turn On:
- Did you check the plug? It might sound like a no-brainer, but hey, even the best of us have those “oops” moments.
- Fuse blown or circuit tripped? A quick check in your electrical panel might save you a service call.
- That Annoying Noisy Affair:
- Is it a thumping sound? It might be those sneakers you threw in. Remember, some things are better off air-drying!
- Squeaking like a mouse? Could be a belt issue or something caught. Time for a deeper dive!
Heat or Lack Thereof: What’s The Deal?
Alright, let’s cut to the chase. You’re in Brooklyn, New York, and the last thing you need is a cold dryer on a chilly day. So, what gives?
- Blocked Exhaust Vent: Dust and lint love to make a cozy home here. Clean it out, and you might just strike gold.
- Failed Heating Element: A bit more technical, but with the right tools and a dash of patience, it’s a breeze.
Uninvited Odors: Why Does My Dryer Smell Funny?
- Dampness: Is the drum dry? If not, you might be looking at a venting problem. Let’s nip that in the bud.
- Something’s burning? Yikes! Time to unplug and call in the pros.
Now, What About That Faulty Dryer Belt?
This one’s a classic! So, how do you know if the belt’s the culprit?
- The drum doesn’t turn but the motor runs: A dead giveaway.
- A loud thud and then… silence: Yeah, that belt just might’ve called it quits.
Wrap-Up: So, Are Dryers Just Moody Machines?
Let’s face it, like any piece of machinery, dryers have their quirks. But with a little TLC, some elbow grease, and a sprinkle of know-how, you’ll have that dryer humming in no time. And remember, when in doubt, there’s always a handy guide or a local Brooklyn expert just around the corner.
Objective: Getting to the Heart of the Matter
Alright, so you’re no stranger to a hiccup or two with household gadgets. And your trusty dryer? It’s no exception. But before you throw in the towel (pun intended), let’s set our sights on what we’re aiming to achieve here.
Our mission, should you choose to accept, is threefold:
- Identify Common Culprits: We’ll demystify the usual suspects causing those dryer woes. Is it just wear and tear, or is there a sneaky gremlin at work?
- DIY or Dial-a-Pro: Not every problem requires a phone call. Some issues, believe it or not, are a cinch to fix. We’ll guide you through deciding when to roll up those sleeves and when to let the experts take the reins.
- Safety First: No compromises here. Whether you’re tackling the issue head-on or just doing some detective work, we’ll ensure you’re clued in on all the safety protocols. Because, let’s face it, what good is a working dryer if we’re not around to enjoy its warm, fluffy bounty?
By the end of our journey, you’ll not only have a clearer understanding of what’s throwing a wrench in your laundry routine but also the confidence to address it. So, let’s gear up and dive right in, shall we?
Procedure: Rolling Up Those Sleeves
Alright, folks, this is where the rubber meets the road. We’ve chatted about common problems and set our objectives straight. Now, it’s time to get our hands a tad dirty and delve into the nuts and bolts of it all:
1. Safety First (Yes, Again!):
- Unplug That Beast: Before you even think about playing detective, make sure the dryer is unplugged. We can’t stress this enough!
- Gloves On: Some of those edges inside are sharp. Better safe than sorry, right?
2. The Grand Opening: Accessing the Dryer’s Innards:
- Top-Loaded Beauties: Slide a putty knife or a flat-head screwdriver between the top and front panel. You’ll feel some resistance – those are the retaining clips. Gently push and lift.
- Front-Loaded Gals: Open the door, and you’ll spot screws near the lint trap or under the door seal. Take ’em out, and the top should lift right off.
3. Belt Reconnaissance: Is It or Isn’t It:
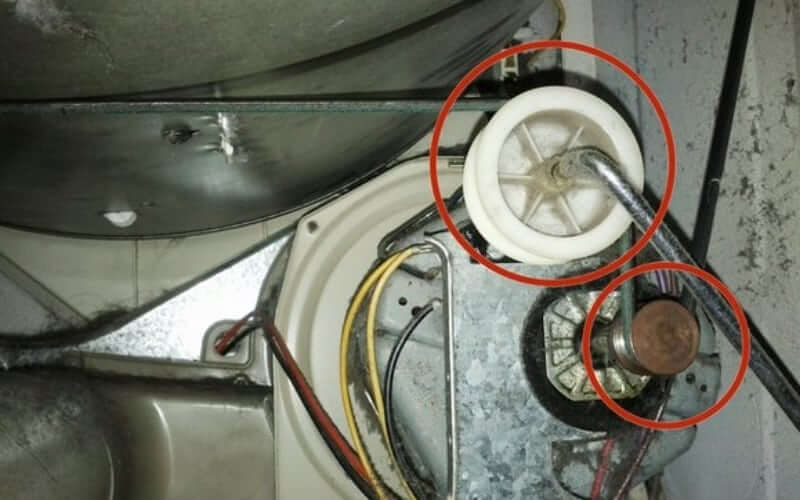
- Visual Check: Look around the drum. See a belt? If it’s hanging loose or looks like it’s taken a beating, you’re on the right track.
- The Hand Test: Give the drum a manual spin. If it’s harder than usual or won’t budge, it’s likely our culprit – the belt.
4. Out With the Old: Removing the Culprit:
- Remember the Path: Before yanking anything, take a quick pic of the belt’s current route. Trust us, it’ll save headaches later.
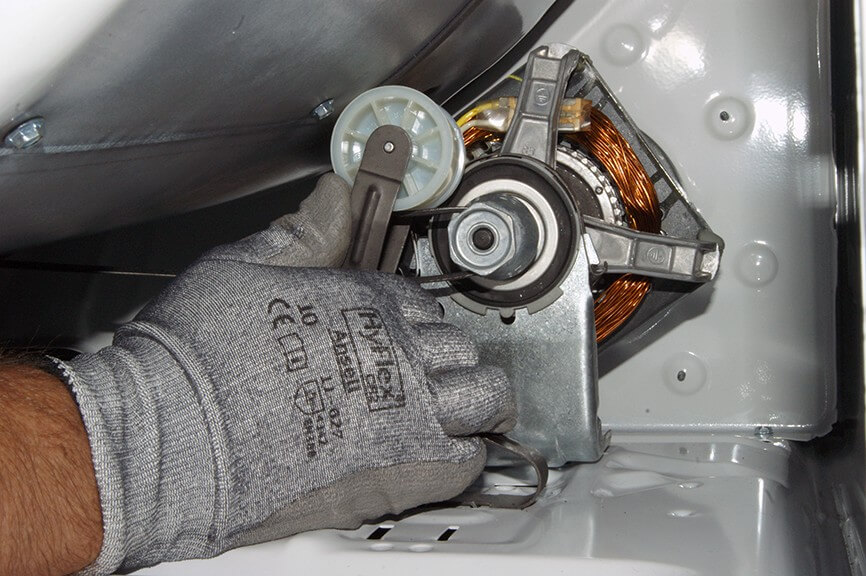
- Release the Tension: Locate the idler pulley – it’s what gives the belt its tension. Gently move it to release the belt from the motor pulley.
5. Clean-Up Operation (Optional, but Hey, Why Not?):
- Lint Patrol: With everything open, now’s a good time to evict any lint squatters. Your dryer will thank you with better performance.
- Check the Drum: Any coins, buttons, or other oddities chilling there? Time to fish them out.
6. In With the New: Belt Installation:
- Place and Position: Get that new belt around the drum. Ensure it’s snug but not stretched.
- Pulley Magic: Using your earlier pic as a guide, route the belt through the idler pulley and over the motor pulley.
7. The Grand Closure: Putting it All Back:
- Test the Drum: Before sealing things up, give that drum another manual spin. All smooth? Great!
- Seal It In: For top-loads, press down till you hear the clips click. For front-loads, replace the screws, and you’re golden.
8. The Moment of Truth: Powering Up:
- Plug and Play: Get that dryer plugged back in.
- Test Run: Pop in a small load and let it rip. Listen, watch, and with a bit of luck, you should be back in business!
And voila! That’s your crash course in dryer belt replacement. Remember, when in doubt, referring to the manufacturer’s manual or getting expert advice is never a bad idea. Happy drying!
The End of the Laundry Saga
Well, well, well, look how far we’ve come! From confused head-scratching to potential DIY champs, it’s been quite the journey, hasn’t it? Dealing with appliances, especially one as crucial as our trusty dryer, can be daunting. But armed with the right knowledge, a sprinkle of patience, and a dash of determination, many of these challenges can be tackled head-on.
Here’s the skinny:
- Knowledge is Power: Being aware of common issues and their fixes is half the battle. It not only saves you precious time and bucks but also makes you feel, let’s admit, a tad invincible.
- Safety Over Everything: Our adventures should never compromise our well-being. Always prioritize safety, even if it means taking a bit longer or seeking help.
- Practice Makes Perfect: If this was your first rodeo with appliance DIY, give yourself a pat on the back. Every time you dive in, it gets a smidge easier.
Remember, appliances, like everything else, have their quirks and moods. They demand respect, love, and occasional maintenance. Treat them right, and they’ll return the favor tenfold.
So, the next time you hear a suspicious thud or a mysterious squeak, don’t panic. Take a deep breath, recall our time together, and know that, come what may, you’ve got this. Until our next DIY adventure, happy laundry days!
Warnings: Better Safe Than Sorry!
Alright, folks, this is where we put on our serious hats for a moment. As fun and fulfilling as diving into DIY territory can be, there are potential pitfalls and hazards to be wary of. Heed these warnings, and let’s keep our laundry days mishap-free:
- Electricity Isn’t Your Pal: Never, and we mean never, attempt any fixes with the dryer plugged in. A moment’s oversight can have dire consequences. Safety first!
- Not All Fixes are DIY-able: While it’s admirable to want to handle things yourself, know when to throw in the towel. Complex issues, especially those concerning the machine’s electronics or gas lines, are best left to professionals.
- Vent Caution: Always ensure the dryer’s vent is clear of obstructions, especially lint. Blocked vents are a leading cause of house fires. Regular checks and cleaning can prevent such mishaps.
- Use the Right Tools: Improvisation is great in jazz, not so much in appliance repair. Using the wrong tools can damage your dryer or, worse, injure you.
- Beware of Sharp Edges: The interiors of many appliances, including dryers, can have sharp edges. Always wear gloves, and be cautious about where you’re placing your hands.
- Replacement Parts: Only use replacement parts that are designed for your specific dryer model. Using incompatible parts can lead to malfunctions or safety hazards.
- Read the Manual: It sounds obvious, but many of us neglect the manufacturer’s guidelines. Before any DIY endeavor, give that manual a glance. It often contains model-specific tips and warnings.
- Chemical Caution: If you’re using any chemicals or cleaning agents, ensure they’re safe for use in dryers. Always ventilate the area and avoid direct contact with skin.
- Stay Informed: Regularly check for recalls or safety notices related to your appliance. Manufacturers occasionally identify issues and offer remedies or fixes.
- When in Doubt, Seek Help: If you’re ever unsure or uncomfortable at any step, don’t hesitate to consult a professional. There’s no shame in seeking expertise; in fact, it’s the mark of a wise DIYer.
In essence, while the DIY route can be incredibly satisfying and economical, it demands a healthy dose of respect for the task at hand. Being informed, cautious, and safety-conscious ensures you get the best of both worlds – the joy of doing it yourself without the risks. Stay safe and happy fixing!
Frequently Asked Questions (FAQs)
Q: How often should I replace the dryer belt?
A: Typically, a dryer belt can last several years, depending on usage. However, it’s wise to inspect it annually. If you notice signs of wear like fraying or cracks, it’s time for a replacement.
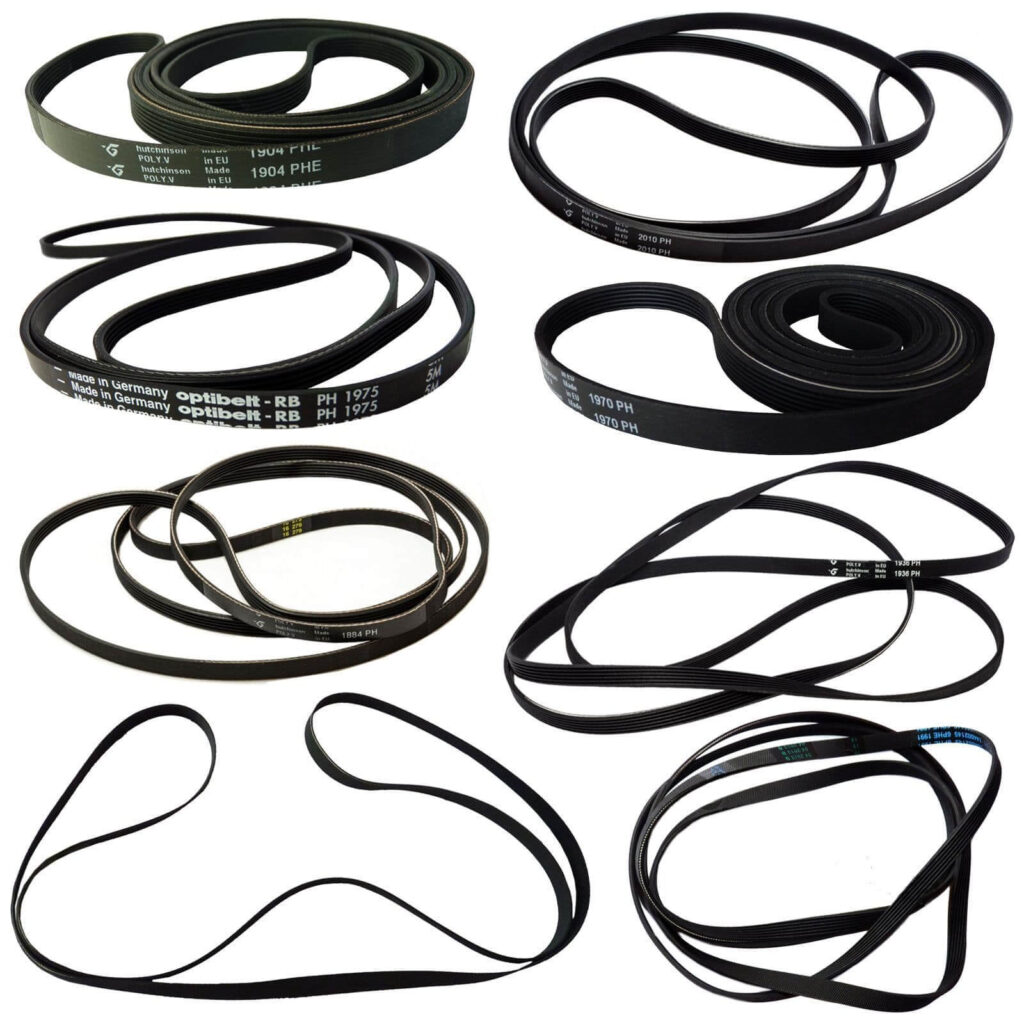
Q: Can I use any belt for my dryer?
A: No, always use a belt that’s designed specifically for your dryer model. Using the wrong belt can cause malfunctions or even damage your appliance.
Q: My dryer is making noise, but the belt looks fine. What else could it be?
A: Other potential culprits could include the motor, bearings, or drum rollers. It’s a good idea to consult the manual or call a professional if you’re unsure.
Q: Is replacing a dryer belt a task suitable for complete DIY beginners?
A: Yes, with the right tools and careful instructions, even a beginner can tackle a belt replacement. However, always prioritize safety and don’t hesitate to seek help if you feel out of your depth.
Q: How can I make my dryer belt last longer?
A: Regular maintenance is key! Clean the lint filter after every load, ensure the exhaust vent is clear, and avoid overloading the dryer. Proper airflow and balanced loads reduce strain on the belt.
Q: Why does my dryer stop mid-cycle, even after replacing the belt?
A: The issue might be electrical or related to the dryer’s thermostat, thermal fuse, or even the motor. It’s best to consult a technician for such problems.
Q: Can a faulty belt affect the dryer’s heating element?
A: Not directly. However, if the belt breaks, the drum won’t turn, and some dryers might automatically shut off the heating element as a safety measure.
Q: Are there any signs I should look out for indicating an impending belt failure?
A: Absolutely! A squeaking or squealing noise, a drum that doesn’t turn easily, or a dryer that heats up but doesn’t spin are all red flags.
Q: Do I need specialized tools to replace the belt?
A: Mostly, you’ll need basic tools like a screwdriver and putty knife. However, it’s always a good idea to refer to the manual, as some models may have specific requirements.
Q: If I’m not comfortable replacing the belt myself, who should I call?
A: Call a professional appliance repair technician. They’re trained to handle such tasks safely and efficiently.