
Ever found yourself in a bit of a pickle, staring blankly at your malfunctioning dryer, wondering, “Why on earth did this have to conk out now?” We’ve all been there. You know, when you’ve got a mountain of damp laundry and plans in just a couple of hours. But before you toss in the towel (literally!) or rush to dial your local repair guy, let’s dive into a quick overview of common dryer snafus. Ready to get your hands a bit dirty and glean some wisdom? Hold onto your lint traps; here we go!
Why Do Dryers Act Up in the First Place?
Well, as with many things in life, sometimes stuff just goes haywire. But more often than not, there’s a rhyme or reason to these hiccups:
- Wear and Tear: Just like us, after a long day, machines too can feel the burn. Your dryer’s been hustling hard, and sometimes, components just wear out.
- Improper Use: Ever crammed it chock-full, hoping to save time? Guilty as charged! But, overloading or underloading can cause some real drama in the long run.
- Neglected Maintenance: Yep, we often forget our lint trap needs some TLC. It’s not just there for show, folks!
What Are the Usual Suspects?
When your dryer decides to go on strike, it’s typically one of these pesky culprits:
- Blocked Vent: If you’ve noticed your clothes taking ages to dry, chances are your vent’s blocked. Time for a clean-up, pronto!
- Faulty Thermostat: Feeling the heat, or perhaps a lack of it? Your dryer’s thermostat might be on the fritz.
- Damaged Drum Seal: Heard some unsavory noises lately? Could be the drum seal throwing a fit.
Gotcha! Now What?
So, you’ve got a hunch about what’s plaguing your beloved dryer. Bravo! But the million-dollar question is, should you roll up your sleeves and tackle it head-on? Or maybe, just maybe, let the pros in Brooklyn, New York handle the heavy lifting? Stay tuned as we unpack the pros and cons of going the DIY route vs. ringing up a repair expert.
Hiring a Professional
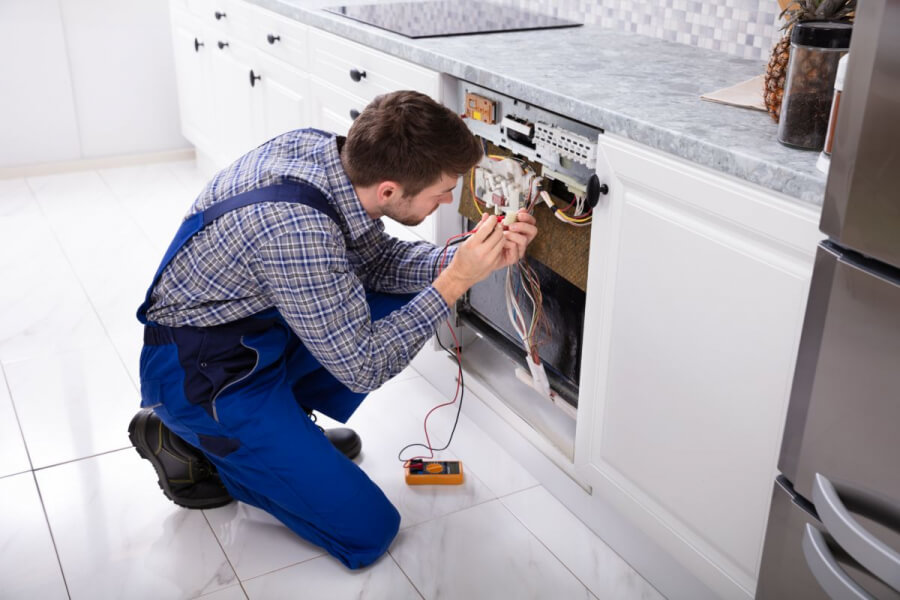
You’ve Got the Problem, They’ve Got the Solution!
So, the ol’ dryer’s acting up again, huh? Before you start pulling your hair out, let’s think about this: Why not let someone with a tool belt and years under it handle the hiccup? Here’s the lowdown on getting a pro to tackle the job.
The Bright Side of Professional Help:
- Experience in the Bag: These folks have seen it all! From quirky quirks to major meltdowns, they’ve been around the block. With that kind of knowledge, they can pinpoint the problem faster than you can say “dryer sheet.”
- Safety First, Always: Let’s face it. Unless you’re an electrician on the side, messing with wires can be… well, shocking. Professionals know the ins and outs, ensuring they don’t fry anything – including themselves.
- Warranty Peace of Mind: If the fix goes sideways (which, fingers crossed, is a rarity), you’ve got a safety net. Many repairs come with a warranty, giving you a cushion to fall back on.
- Tick-Tock Goes the Clock: Time’s precious, ain’t it? Professionals can swoop in, get the job done, and swoop out before you’ve even finished your cup o’ joe.
- Parts? No Problem: Picture this: you’re knee-deep in a DIY repair when you realize you need a part. Bummer, right? Pros usually come equipped with all the bells and whistles, ensuring no mid-repair store runs.
But, Wait… There’s a Flip Side:
- Show Me the Money!: Yep, expertise comes at a price. Hiring a professional can lighten your wallet, especially if the glitch is teeny-tiny.
- Hang Tight: They might be swift once they’re there, but sometimes you’ve got to play the waiting game. Getting a slot that jives with your schedule? That can be a whole song and dance.
Handing the reins over to a pro can be a real godsend, especially when you’re in over your head. They bring the tools, the know-how, and the cool-headedness to the table. But remember, every silver lining has its cloud. Weigh your options, and make a choice that doesn’t leave your head spinning or your pockets empty.
DIY Dryer Repair
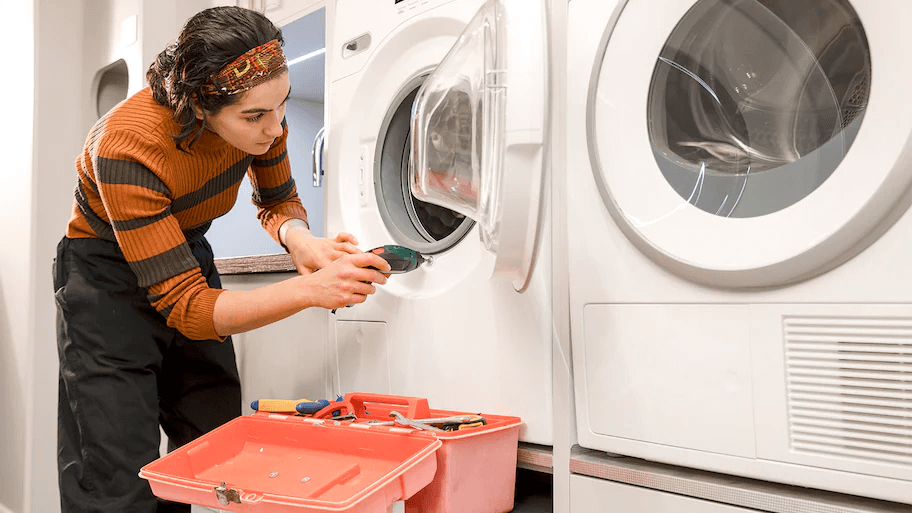
Alright, you mavericks! Considering diving into the world of DIY dryer repair, are we? It’s not all sunshine and rainbows, but it ain’t rocket science either. Grab your toolbox and let’s delve into the nitty-gritty of fixing that pesky dryer yourself.
The Perks of Playing Handy(wo)man:
- Keep That Cash: No need to break the bank. Doing it yourself can save you a pretty penny, especially when it’s a minor hiccup.
- Learn, Grow, & Brag: There’s something wicked satisfying about fixing stuff with your own two hands. Not to mention, you get to flaunt your newfound skills at every backyard BBQ.
- You Call the Shots: Forget scheduling woes. You decide when to tackle the repair. Midnight or midday, the choice is yours.
Hold Up… There Are Some Speed Bumps:
- Whoopsie-Daisy Moments: Dive in without a plan, and you might find yourself in deeper water. Mistakes happen, and sometimes, they can make things worse.
- Safety? What’s That?: A wrong move, and zap! Things can get dicey if you’re not cautious. Always remember to unplug before you plunge!
- The Eternal Quest for Parts: Ever been on a wild goose chase? Hunting for a specific part can feel just like that. And if you order online, there’s the agonizing wait.
- Time’s a-Ticking: While pros zip through repairs, DIY can be a game of patience. It might take a hot minute (or hour) longer than you’d like.
Tips for DIY Dryer Repair
1. Safety First!
- Unplug Before You Tug: Always disconnect the power before diving into any repairs. It’ll keep you safe from any unexpected jolts.
- Gas Dryers: If you have a gas dryer, shut off the gas supply. You don’t want any leaky surprises.
2. Gather the Right Tools:
- Must-haves: Screwdrivers, adjustable wrench, multimeter, putty knife, and a flashlight.
- Model Specific: Some dryers might require unique tools. Check your user manual or search online for specifics.
3. Know Your Dryer:
- Manufacturer’s Manual: This is your first point of reference. It often has troubleshooting tips and diagrams.
- Online Resources: There’s a plethora of forums, videos, and how-tos tailored to specific dryer models and problems.
4. Start Simple:
- Clean the Lint Trap: A clogged lint trap can cause a myriad of issues, including inefficient drying.
- Inspect the Vent: A blocked vent might be the culprit. Ensure it’s clean and has no obstructions.
5. Listen & Observe:
- Noisy Dryer?: Odd sounds can indicate problems like worn-out belts, faulty bearings, or damaged drum glides.
- Not Heating?: It might be a bad thermostat, fuse, or heating element.
6. Replace Faulty Parts:
- Buy Quality: If you’re replacing parts, invest in high-quality ones, preferably from the manufacturer.
- Take Photos: Before removing old parts, snap a photo. It’ll make reassembly a breeze.
7. Test Before Reassembling:
- Spot Checks: After making your repairs, plug in the dryer and test it out before putting everything back together. It’ll save you the hassle in case you need to make any adjustments.
8. Know When to Call It:
- Not All Battles Are Worth Fighting: If you’ve given it your best shot and the problem persists, it might be time to call in a pro. Some repairs, especially those involving the gas or complex electronics, might be out of the DIY realm.
9. Stay Organized:
- Label & Bag: If you’re removing multiple screws and parts, keep them organized in labeled bags.
- Take Notes: Jot down steps as you go along, especially if it’s a prolonged repair.
10. Continuous Maintenance:
- Clean Regularly: Regularly clean the lint trap, exterior vent, and around the dryer. It can prevent many common issues.
- Monitor Performance: Always keep an ear out for odd noises or changes in performance. Early detection can simplify repairs.
So, What’s the Verdict?
Going the DIY route can be a thrilling rollercoaster. The highs of conquering a repair are oh-so-sweet, but the lows? Boy, they can sting. Before you jump in boots and all, ensure you’ve done your homework. Remember, there’s no shame in admitting a task is above your pay grade and calling in reinforcements. But if you feel the DIY spirit coursing through your veins, more power to ya!
To DIY or Not to DIY, That Is the Question
Alrighty, folks, we’ve journeyed through the maze of professional help and the winding paths of DIY. Feeling like a champ with a spanner or more at ease letting a pro take the helm? The choice, as they say, is yours.
Final Food for Thought
- Know Thyself: It’s not just an old adage; it’s solid advice. Gauge your comfort level. If alarms are ringing in your head at the mere thought of prying open that dryer, maybe it’s a sign to step back.
- The Middle Road: Here’s a curveball – how about starting DIY and then calling in the cavalry if things get hinky? You get the best of both worlds!
- The Time Crunch: Got an event coming up? A mountain of laundry waiting? Sometimes, time is of the essence. Decide whether you can afford a learning curve or if you need a quick fix.
- Cost vs. Value: While saving bucks is fantastic, remember to factor in the value of peace of mind. Sometimes, the reassurance a professional offers is worth its weight in gold.
Wrapping It Up
Whether you’re about to channel your inner handy(wo)man or dial up the local repair wizard, remember one thing: it’s all about getting that dryer up and running smoothly. So, weigh your options, trust your gut, and here’s to warm, fluffy clothes in your near future!
Frequently Asked Questions (FAQs) about Dryer Repair
Q: Why is my dryer taking longer than usual to dry clothes?
A: Several factors could be at play. The most common reason is a clogged vent, restricting airflow. However, it could also be due to a faulty thermostat or heating element. Regular maintenance and cleaning can help prevent such issues.
Q: How often should I clean my dryer’s lint trap?
A: Ideally, the lint trap should be cleaned out after every load. It’s a small task that goes a long way in maintaining your dryer’s efficiency and preventing potential fire hazards.
Q: Is it safe to run my dryer if I’m not at home or while I’m sleeping?
A: It’s generally not recommended. While modern dryers have safety features, they can still pose a fire risk, especially if they haven’t been maintained. It’s always better to be safe than sorry.
Q: When should I consider replacing my dryer instead of repairing it?
A: If your dryer is over 10-12 years old and frequently breaking down, it might be more cost-effective to replace it. New models are often more energy-efficient, saving you money in the long run.
Q: Can I mix different fabrics and weights in one dryer load?
A: It’s best to dry similar fabrics together. Mixing heavy items like towels with lighter fabrics can lead to uneven drying. Some items might end up still damp while others could be overdried.
Q: How can I ensure my dryer runs efficiently?
A: Regular maintenance is key. Clean the lint trap frequently, ensure the exterior vent is clear, and consider having the dryer professionally serviced from time to time.
Q: My dryer is making strange noises. Should I be concerned?
A: Unusual noises can be a sign of a problem, like a damaged belt or faulty motor. It’s best to address these sounds early to prevent more extensive, expensive damage.
Q: How much does a typical professional dryer repair cost?
A: Costs can vary based on the specific issue and your location. On average, you might spend anywhere from $100 to $400, with more complex repairs running higher. Always get an estimate before proceeding with repairs.